Лучшие Bootstrap шаблоны WordPress. Как сделать подключение bootstrap к wordpress? Облегченный доступ к скриптам
От автора: всем привет. В прошлой статье мы рассмотрели подключение фреймворка к веб-странице, но если мы говорим о том, как подключить Bootstrap к WordPress, то здесь все выглядит немного по-другому. Давайте же рассмотрим, как сделать подключение правильно.
Итак, создадим перед собой задачу. У нас есть шаблон на wordpress, к нему нужно подключить bootstrap. Как это сделать? Казалось бы, чего тут сложного, подойдет тот же код, который мы использовали для подключения к веб-странице. Но не тут то было, если вы попытаетесь в header.php, в котором в wordpress-шаблоне выводится секция head, добавить тот самый код:
< link href = "css/bootstrap.min.css" rel = "stylesheet" > |
Ничего не выйдет, стили фреймворка не подключатся. Почему и что нам с этим делать? Во-первых, посмотрите на путь, ведущий к таблице стилей. Давайте вспомним, что wordpress читает путь начиная с корневой папки сайта, а не шаблона, у нас же путь прописан только относительно шаблона. Реальный же путь, по которому находится файл, выглядит так:

/wp-content/themes/название-темы/css/bootstrap.min.css
/ wp - content / themes / название- темы/ css / bootstrap . min . css |
Итак, стили не подключаются потому, что просто неправильно задан путь. Во-вторых, в wordpress есть специальные функции, которые позволяют правильным образом подключать скрипты и стили. Я предлагаю вам как раз воспользоваться этой функцией и подключить файлы фреймворка оптимальным образом. Для этого нам нужно будет написать некоторый код в functions.php в нашем активном шаблоне.
Чтобы его отредактировать, соединитесь с сайтом по ftp и перейдите в каталог с активной темой, найдите там соответствующий файл. Предлагаю вам сохранить его резервную копию на всякий случай. Теперь откройте его с помощью удобного вам редактора. Можно не изучать особо его содержимое, все равно, если вы не знакомы с wordpress-функциями, то ничего не поймете, разве только из комментариев разработчика.
Пройдите в самый конец, сюда мы и будем добавлять код, который подключит фреймворк к движку.
Поскольку мы тут не изучаем wordpress-функции, я просто дам вам готовый код, который сразу подключит js и css-файлы фреймворка. Ниже я позволю себе немного объяснить этот код.
function load_bootstrap(){ wp_enqueue_script("bootstrap-js", get_template_directory_uri()."/js/bootstrap.js"); wp_enqueue_style("bootstrap-css", get_template_directory_uri()."/css/bootstrap.css"); } add_action("wp_enqueue_scripts", "load_bootstrap");
function load_bootstrap () { wp_enqueue_script ("bootstrap-js" , get_template_directory_uri () . "/js/bootstrap.js" ) ; wp_enqueue_style ("bootstrap-css" , get_template_directory_uri () . "/css/bootstrap.css" ) ; add_action ("wp_enqueue_scripts" , "load_bootstrap" ) ; |
Итак, нам нужно будет написать новую функцию, назовем ее произвольно, я предлагаю так – load_bootstrap, чтобы сразу было понятно. Внутри функции прописываем две wordpress-функции. Первая отвечает за подключение скриптов, вторая – за css-стили. Сами функции абсолютно идентично работают и имеют 2 обязательных параметра:
Название функции. Его можно написать произвольно. Опять же, я предлагаю назвать так, чтобы было сразу все понятно.
Путь к подключаемому файлу. Очень важно задать его правильно, если вы просто пропишите js/bootstrap.js, то ничего работать не будет, так как я уже говорил, что wordpress ищет файлы от корня сайта, а в корне папки js просто нет, она присутствует в нашем шаблоне, куда вы заранее должны скинуть файлы фреймворка.
Собственно, чтобы правильно задать путь, нужно получить путь к папке с активным шаблоном, а потом уже дописать сам путь к скрипту в этом шаблоне. Как это сделать? Тут нам поможет функция get_template_directory_uri(). Прописываем ее и пристыковываем путь к файлу.
Если вам нужно подключить больше файлов, то просто с новой строки заново пишем функцию wp_enqueue_script или style, указываем в параметрах название и путь.
На этом составление функции, которая будет подключать наши файлы фреймворка, закончено. Но если сейчас вы захотите начать пользоваться возможностями фреймворка, то еще рано. Нам необходимо дать движку эту функцию на выполнение. Это как раз и делает последняя строчка вышеуказанного кода, которая начинается с функции add_action.
В ней мы должны указать 2 параметра: первый будет неизменен в нашем случае, это функция wp_enqueue_scripts. Именно с s на конце, это важно! Вторым параметром нужно указать название нашей общей функции, в которой мы подключаем наш js и css-файл.
Итак, мы рассмотрели с вами правильное подключение bootstrap к wordpress. Если в будущем вам нужно будет подключить новые файлы фреймворка, не нужно будет писать для этого новую функцию, а всего лишь добавьте или измените нужные строки кода в уже имеющейся у вас функции load_bootstrap().
Благодаря тому, что мы сделали все таким образом, подключение фреймворка будет работать при изменении доменного имени, при изменении имени шаблона и т.д. Что ж, вы можете начинать использовать фреймворк для своих целей, на этом я заканчиваю эту статью. Если вы хотите в максимально короткие сроки освоить bootstrap, рекомендую вам пройти , в котором вы сможете сверстать 2 сайта, лендинг, то есть одностраничный сайт, а также получить хорошую теоретическую подготовку.
Фреймворк Bootstrap 4. Быстрый старт
Изучите основы Bootstrap 4 на практическом примере по верстке блога с нуля
Всем привет. Давно уже хотели сделать заготовку-шаблон для разработки сайтов под wordpress. Очень любим фрейм bootstrap — если кто-то знает, что-то проще и легче для разработки адаптивных сайтов — то пишите в комментариях (лучший совет разместим в статье и укажем ссылку на ваш сайт).
Сразу отметим, что эта bootstrap тема wordpress создана на основе другого чистого шаблона — https://github.com/saxap/clean-wp-template , однако мы провели некоторые изменения и дополнительную очистку кода.
Тема bootstrap wordpress для разработки
Да, тема в первую очередь для разработчиков. Если вы любите чистый код и высокую скорость загрузки, и в тоже время можете написать небольшую тему на буте, то данный шаблон для вас.
 Данные из PageSpeed Insights
Просто устанавливаем голый wordpress, накидываем тему и получаем следующее:
- Через function.php проведена чистка лишних функций wordpress, который захламляют код и увеличивают время загрузки сайта (удалены emoji, отключен REST API, его фильтры, события и embeds).
- Создано 2 меню адаптированных под bootstrap. Через админку создаете верхнее и нижнее меню.
- Подключён файл стилей style.css, Где вы можете указать собственный CSS код для костамизации шаблона (В этом файле я добавил небольшой код для украшения темы, однако, вы можете удалить этот код, чтобы сохранить исходный вид bootstrap).
- Миниатюры постов и кастомные размеры картинок.
Мы бы рекомендовали вам перенести блок
Нет ничего лучше для поисковика, чем страница для печати
Однако, перенос хедера — это дело ваше. Но в пользу своей позиции приведу авторитетный пример — https://devaka.ru/ .

После редизайна сайта в коде можно заметить, что хедер подгружается из футера (сайт тоже сделан на wordpress). А Сергею Кокшарову мы бы доверяли.
Файлы в теме Bootstrap WordPress
С файлами все стандартно — просто ничего лишнего.
- 404.php - шаблон 404
- author.php - шаблон вывода постов автора
- archive.php - архив постов
- category.php - шаблон постов категории
- comments.php - шаблон комментариев, там сам вывод и форма, разметка списка комментариев в functions.php
- footer.php - подвал сайта
- function.php - функции шаблона
- header.php - шапка сайта
- index.php - шаблон вывода последних постов для главной
- loop.php - пост в цикле
- page.php - обычная страница
- search.php - шаблон поиска
- sidebar.php - сайдбар
- single.php - отдельная страница поста
- style.css - стили темы и описание
- tag.php - посты по тэгу
- /js - скрипты бутстрапа и шаблона
- /css - стили бутстрапа
- /fonts - шрифты бутсрапа
Заметим маленький нюанс — блок
Скачивайте, пробуйте. Пишите свое мнение в комментариях.
Looking to combine Bootstrap with WordPress. These Bootstrap WordPress themes are exactly what you need.
Bootstrap is a responsive grid-based framework that helps amateur and professional designers develop their own website straightforwardly. It is a well-known front-end framework that works efficiently in building a responsive and mobile-ready website. Web designers know how valuable Bootstrap technology can be in creating eye-catching yet responsive websites based on HTML, CSS and the extensions of JavaScript. Bootstrap definitely makes front-end web development quicker and painless. In fact, several of our free WordPress themes, even our websites, are also designed and developed using Bootstrap. We are huge fans of this framework and we hope that you can find it useful as well in combination with WordPress or any other blogging or CMS platform.
Without further ado let’s have a look at these free WordPress Bootstrap themes:
Shapely (Most Popular Bootstrap Theme)
The market is filled with numerous devices from which the internet can be accessed. This puts some extra pressure on websites, as it can be challenging for the layout to resize itself in order to fit smaller screens. Thankfully, Shapely was developed using the innovative Bootstrap 3 front-end framework. This incredible WordPress theme will be able to showcase your content on any device, operating system, or web browser. Additionally, those who own high-resolution HiDPI displays can enjoy some jaw-dropping vectorized icons, sharp pictures, modern graphics, and vibrant color palettes.
Furthermore, there are many personalization settings available; thus, site owners can easily change text palettes, introduce footer info, or modify the sections. It is also possible to expand your reach and attract new followers, as Shapely is entirely translatable. Thanks to WooCommerce, it is possible to construct personal online stores in order to sell merchandise. For those who wish to learn more about this theme’s core features, an informative and extensive theme documentation file was added. You don’t have to be an expert programmer in order to use Shapely, and this document proves it. After you read, be sure to check out the theme demo.
Illdy (Trending)
 Illdy is a responsive free WordPress creative multipurpose website theme. This theme is a wholly all-inclusive, ambitiously expansive developed to meet and exceed the needs of webmasters seasoned and inveterate alike across a very broad range of industries, interests and fields, with a streamlined, simplified page design and construction process centered on the WordPress Live Customizer and a series of advanced, polished, professional-quality widgets and shortcodes deployed right before your eyes as they will be in the final product, resulting in websites that always match your expectations.
Based on cutting edge Bootstrap technologies, Illdy is not only supremely cross-compatible and responsive from the code up, but it also magnificently developer-friendly, with a completely modular design that is very human legible and easily adapted, modified or built upon to suit your specific needs. With Illdy, adapting a new plugin or expanding on an extension to specific usage cases is as easy and copying and pasting, and your IT crew will appreciate the ease of working with Illdy. Try Illdy today!
Antreas

Antreas is a reliable and effective free WordPress business website theme. Today, digital business grows at an unrivaled pace. So it means every industry is competing in the new digital marketplace, reaping a windfall. Antreas lets your business catch up, overnight. Regardless of your background or experience, Antreas delivers professional quality results. Essentially, you get functional business websites that engage global audiences in modern style. A visual page editor makes extensive customization effortless. Drop widgets, sections and pages without breaking a sweat. Fine-tune colors, animations and layouts without any coding. Branding your website to exact specifications is an intuitive, quick ordeal. Handy shortcodes let you craft custom pricing tables that suit your specific needs. Smooth media sections and sleek blog posts bring spruce things up. Give your brand identity and market your wares in the blink of an eye. Get Antreas for free today, and level up!
Pixova Lite

Pixova Lite is a WordPress theme ideal for those without coding skills to make their own site. Special features include a Parallax header image with text and buttons for call to action. It also features Amazing Google Fonts and unlimited colors within layout options. Pixova Lite lets you show or hide sections such as recent work or news. Additionally, with a call-to-action button you get to show video or images slides in header. You also get to customize backgrounds with images, logos and more. Try adding animations and play with different sections to give a dynamic feeling to the page. Get creative and let your mind fly! Use Pixova Lite!
Newspaper X

Neswpaper X is a WordPress theme that specialized itself on the media, news and magazines. It is also the perfect set up to get a digital version of any storytelling writing. You will get awesome content pages including for blogs and contact. Additionally, Newspaper X provides a recent post section and separates stories in 4 aspects. These are world news, latest news, editorial and events. Newspaper X comes with a cool topbar and a footer that include social media icons, and a header. With this one you get to put your “front pages on the spot”. Just try out for yourself and get convinced! Get Newspaper X!
Ascendant

Ascendant is a WordPress multi-purpose theme that goes for versatility and simplicity. It also comes with a demo and awesome premium features. You will get a fast quick set up with its multiple custom shortcodes. Ascendant gives you a layout ready for a challenge! It can handle unlimited posts pages and up to 5 sidebars. Get crafty with +100 Google Fonts to write and unlimited color options too. Moreover, Ascendant uses WooCommerce plug-in and it is all browsers compatible. It has many social related features that make it great for blogs or personal websites. It also comes in 3 different presentations, free and paid. Handle the online things fast and easy with Ascendant!
NewsMag Lite
 NewsMag Lite is an amazingly modern and technologically savvy, sophisticated and attractive, readily responsive free WordPress online magazine website theme. This theme has been created as a simple yet powerful platform for webmasters who want to set up their own online magazines, regardless of the nature or content of them. Also with unique flexibility provided by a treasure trove of demo website templates, NewsMag Lite can cater to the general and the specific, with multiple niche markets directly provided with convenient demos and plentiful customization options to turn any demo into the perfect magazine for your niche interest or audience.
It’s built on the latest HTML5 technology and styled by CSS3, with gorgeous Parallax backgrounds and scrolling effects as well as a modular Bootstrap design that renders your NewsMag Lite websites natively responsive, mobile friendly and cross-compatible with all devices and browsers across the board. With NewsMag Lite’s extensive documentation, you can always be sure you are making full use of every perk and feature contained within this incredibly powerful free online magazine theme. WooCommerce ready out of the box, NewsMag Lite can easily let you market your wares from your own online store, right out of your online magazine website. Get NewsMag Lite today!
Sparkling


Sparkling gleams with elegance together with its . It is also based on the latest bootstrap technology. Because of its sharp design and fluid layout, Sparkling still looks brilliant on any mobile devices. This free WordPress theme also comes with a profusion of great features that you can usually find in premium WordPress themes. Its full-screen slider allows you to call attention to your magnificent photos and other creative content. It supports plugins such as Gravity Forms, Contact Form 7, SEO by Yoast, W3 Total Cache and many more. The developers created Sparkling with great SEO standards.
Activello

Activello is a very user and developer-friendly, flexible, customizable, responsive WordPress multipurpose theme. It has been fully decked out with all the page templates, layout styles and sophisticated widgets necessary to run successful, expansive websites across a huge range of industries and fields, personal or professional.
Activello’s particular visual language and warm, soft-spoken nature makes it, however, an excellent candidate as a theme for running beautiful and modern lifestyle blog websites. Whether you are telling the world about your latest journeys or the events you take part of, or simply keeping a tight, captive audience well informed of your passions and their development. Also with Activello’s jam-packed shortcodes and visual elements, you can tie together your website in a neat and polished fashion. You can also add custom-built sliders that you can very easily make your own. Moreover, this theme has smooth and gorgeous, expansive dropdown menus, to let your visitors easily find their way about your website and its content, increasing the overall pleasantness of your website. Activello is also powerfully responsive, meaning you need not worry about cross-compatibility issues; Activello will always look just the way it should.
MedZone

MedZone is a premium quality WordPress theme. It makes itself a high place on ranks with a medical and business orientation. It is simple and intuitive but provides everything you will need. MedZone comes with a super flexible layout that allows customizations at many levels. It also has the section of a recent post on the sidebar and footer. This is perfect to set your health care or medical news blog. In addition, MedZone features awesome trades like staff pages, online services, and special medical icons. You will find its design quite responsive, not only to screens and devices. Unlimited colors, a footer and the section of a recent post to play with. This powerful tool is also ready for business with WooCommerce!
Moreover, you can use MedZone to present a medical business with technological methods at reach. It offers enhanced speed performance and a smooth-running code. Coding will be less than necessary. MedZone uses an awesome one-click install demo that makes setting up really easy! It also features an incredibly dedicated support team and constant updates. Even in the free version! (There are two, the other one, pro-version is even better). Have look! (Be sure to prepare yourself to be blown away, though!) Use MedZone!
More info / Download DemoPortum Material

Portum Material is an outstanding free Bootstrap WordPress theme that will get you going on the web in little to no time. It is also a versatile and adaptive tool that will cater to your project and business needs seamlessly. Even with the default settings alone, you can create a spectacular page that will impress and amaze all your visitors. Create a strong impact on them and have them hooked in an instant. Utilize the full-width slider and win them over right off the bat.
With its simple customization features, you can fine-tune Portum Material without a hitch. On top of that, you don’t really need to be a pro at building websites, but you can still hammer out a cracking web space that will wow everyone. Take a peek at the live preview and get the gist of it.
Portum Clean

Cleanness and sophistication are written all over Portum Clean’ layout. It is a free Bootstrap WordPress theme that you can use for an assortment of different businesses and agencies. Even as a freelancer or any other professional individual, you can use Portum Clean and take care of your online presence the first-class way. The design is there, at your service, ready and all set up for you to take it to your advantage and shine online.
Portum Clean’s very many features include portfolio, animated statistics and skillbars, testimonials, back to top button, sticky navigation and multi-level drop-down menu. Implemented into the design is also a working contact form for your convenience. It should not be long before you find yourself live online with Portum Clean, attracting new clients and growing your business.
Dazzling

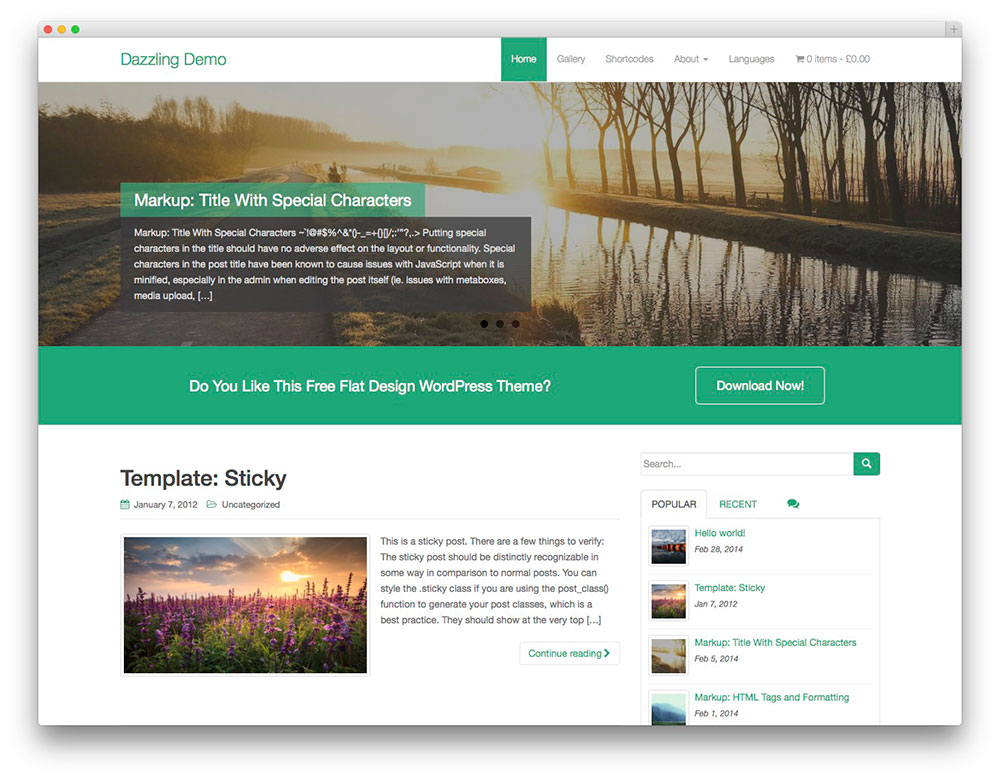
Dazzling is a beautiful Free WordPress theme based on Bootstrap 3, which makes it responsive and mobile-friendly. This theme provides an optional full-screen featured slider, which is really helpful for . If you are a fan of flat design with mint green accent colors, then this theme is perfect for you! Aside from its clean design, it also comes with various incredible features like Logo upload support, retina ready, customizable call-to-action section, support for font awesome icons, color customization for every aspect of the theme, popular posts widget, infinite scroll and translation ready. Furthermore, Dazzling includes additional optimization for several popular plugins WordPress SEO, Jetpack, Contact Form 7 and more.
Eyepress Lite

Eyepress Lite is a free Bootstrap WordPress theme which you can utilize for building remarkable and eye-catchy personal blogs. It has a 100% responsive and cross-browser compatible layout which works on all devices like a dream. Even when it comes to retina screens, Eyepress Lite makes sure to deliver all the content stunningly all the time. Additionally, Eyepress Lite is also optimized for search engines and speed. You can now start your project in close to no time, as well as with as little work and energy as possible.
Some of the features of Eyepress Lite are masonry grid, three layouts, profile menu and back to top button. You will not even want to change the default setting much due to the fact how pretty, clean and modern it is. Waste no more time, choose Eyepress and have a page up and running right away.
More info / Download DemoSirat

With its multi-purpose approach to web design, Sirat is a free Bootstrap WordPress theme for many different projects. Whether you plan to build a page for an agency, a small business or a blog, this is the site canvas for you. While it suits many intentions out of the box, you can also customize Sirat further and make it follow your needs accurately. You will have a small breeze modifying and altering the layout even if you have no prior experience.
When working with Sirat, coding knowledge is not necessary. You can be an utter beginner and still successfully establish a striking and professional online space. Sirat is very user friendly, as well as following all the latest trends and regulations. To capture their attention, Sirat sports a nifty slider. There is also complete documentation included in the bundle in case you might need extra assistance.
More info / Download DemoTattoo Expert

With the popularity of tattoos, chances are, you are a tattoo artist as well. On the other hand, you might be working with one, helping him or her sort out a dope online presence. Tattoo Expert is a free Bootstrap WordPress theme with all the necessary to start attracting even more ink passionate individuals to join your tribe. Show your work portfolio and put on display all your outstanding and mind-bending projects.
Tattoo Expert comes with handy customization functions, mobile-friendly design, custom logo feature, social sharing and attractive slider. Other goodies include contact and subscription form, blog pages, call-to-action buttons and fast loading speed. Working with Tattoo Expert will also be hassle-free as it will never ask you for any programming or design knowledge. You can now comfortably spread the word out even if you are short on time due to the speedy page launch Tattoo Expert ensures.
More info / Download DemoVW Travel

VW Travel is a free Bootstrap WordPress theme for everything travel and tourism related. It is a versatile and adaptive website canvas for you to employ with ease. However, even if you plan to use it out of the box, you can also experience great results as the theme is already professional and sophisticated. Of course, you can always step things up with your personal customization tweaks and make it follow your branding regulations.
Moreover, VW Travel is fully optimized to help you shine online like a pro from the beginning. You will never need to worry about any of the technical parts of your travel page since VW Travel follows all the current trends and regulations in web development. Start your thing with the right foot forward and make a difference today.
More info / Download DemoExpert Movers

By default, Expert Movers is a free Bootstrap WordPress theme for logistics and transportation companies. However, because it can be used for multiple purposes, you can utilize the amazing site canvas for different business, too. Feel free to go entirely against the grain with Expert Movers and make a unique and creative outcome that will drive your business forward. It is way easier than you think, working, editing and establishing a fully active page with Expert Movers. This theme offers a codeless experience, meaning, even someone who has never built a page yet can now create one with Expert Movers.
In addition, Expert Movers features a catchy slider, call-to-action buttons, drop-down menu, accordions and loads all the content on scroll. Upload your custom logo, link your page to your social accounts and even start a blog, the options are there, ready and all set up for you to put into play.
More info / Download DemoDigital Agency Lite

When starting out in the online space, you do not always need to go straight to investing a chunk of your budget in getting the website done. With Digital Agency Lite, a free Bootstrap WordPress theme, you can set it up without spending a dime. It is a powerful and easy to use tool that you can start working with in just a click. Moreover, when it comes to Digital Agency Lite, you do not need to worry about the technicalities. The tool rocks it all, responsiveness, fast loading, cross-browser compatibility and retina-readiness.
Other specialties of Digital Agency Lite include sticky header, sliders, animations, on scroll content loading, pricing plans and testimonials. It is a highly resourceful theme that unlocks a whole new specter of possibilities entirely free of charge.
More info / Download DemoAxiohost

Axiohost, as the name suggests, is a free Bootstrap WordPress theme for hosting companies and domain registrars. If you are just starting out, get things moving forward with a free tool and go from there. With Axiohost, you can see amazing results in close to no time. The tool is packed with excellent features and functions for a top-notch outcome. Keep in mind, if a tool is free of charge, it does not necessarily mean the end product will be half-baked. Not in the case of any of these best themes.
The layout is 100% responsive, working like a dream on smartphones, tablets and desktop computers. It is fully compatible with the Elementor drag and drop page builder, offering you to avoid programming altogether. You are just a few moments away from getting things to happen and shine online.
More info / Download DemoArileWP

ArileWP is a versatile multi-purpose free Bootstrap WordPress theme that suits an assortment of different businesses. You can employ ArileWP for agency, consultant, corporate, freelancer and education websites, to name a few. The clean, minimal and professional look of ArileWP easily acclimatizes to all sorts of different aims and intentions. ArileWP is also compatible with the powerful Elementor page builder for effortless customization.
Needless to say, ArileWP was built with mobile-friendliness in mind. Indeed, it has a fluid layout that fits smartphones, tablets and desktops computers perfectly. It also works with the majority of well-liked plugins for quick and effortless integration. If you are ready to create a strong and lasting first impression on all your potential prospects, let ArileWP do the trick. Wow everyone with a high-end business website and enjoy the outcome.
More info / Download DemoUnite


Unite is a sleek and modern free WordPress theme with fully responsive flat design. The creators developed this theme using the newest Bootstrap 3 for minimalism and user friendliness. With this fully customizable theme, you are able to tweak some elements in your framework such as footer, navigation menu, fonts and a lot more. This modern theme is suitable for wedding websites/blogs but can also look great on other creative sites that need image-centric design. Unite is a work of genius that will make your wedding or any other website stand out.
Adventure Travelling

Adventure Travelling is a free Bootstrap WordPress theme which you can use for different travel and tourism businesses you run. It is a multi-purpose website canvas that you can effortlessly alter to your needs and regulations and appear online professionally. Adventure Travelling sports an eye-catching web design that will attract everyone’s curiosity and encourage them to take action.
Moreover, with its fluid and highly adaptive layout, Adventure Travelling seamlessly adjusts to all screen sizes, from mobile devices and up to desktop computers. The interface is very user friendly, ensuring you to modify the default style of Adventure Travelling even if you have no prior experience. Make it stand out from the crowd and see the difference in an instant. Also with Adventure Travelling, you will experience fantastic online results with zero investment.
More info / Download DemoRelief

In this collection of free Bootstrap WordPress themes, we bring you a broad range of contrasting tools to cater to as many – if not all – industries and niches as possible. For medical and health-related businesses, Relief is one of the best solutions for you. Whether a hospital, a dentist, a surgeon, a veterinary clinic, therapy or other health centers, Relief is all set up and ready to sort you out with a professional web space.
While you can rock the online space with the out of the box version, it is advisable to enrich Relief with your branding and other custom tweaks and differentiate yourself from the masses. After all, Relief is free and easy to update to make sure you get the most out its fantastic features and assets.
More info / Download DemoStanleyWP


Stanley is another noteworthy WordPress Theme produced by BlackTie. Stanley adapts the finest Bootstrap technology with minimal integration of color. Just because it is free doesn’t mean it is substandard or inferior in terms of theme features. In fact, this modest WP theme actually offers heaps of built-in features like drag and drop homepage builder, theme options panel, portfolio post types, three page templates, Font Awesome 4 and fluid layout design. This theme is custom-built to let you showcase your work to the world in a straightforward way. So generally speaking, it is perfect for blogging theme and boosting personal brand. The creators designed this theme with freelancer web designers and creative people in mind.
Всем привет. Давно уже хотели сделать заготовку-шаблон для разработки сайтов под wordpress. Очень любим фрейм bootstrap — если кто-то знает, что-то проще и легче для разработки адаптивных сайтов — то пишите в комментариях (лучший совет разместим в статье и укажем ссылку на ваш сайт).
Сразу отметим, что эта bootstrap тема wordpress создана на основе другого чистого шаблона — https://github.com/saxap/clean-wp-template , однако мы провели некоторые изменения и дополнительную очистку кода.
Тема bootstrap wordpress для разработки
Да, тема в первую очередь для разработчиков. Если вы любите чистый код и высокую скорость загрузки, и в тоже время можете написать небольшую тему на буте, то данный шаблон для вас.
Данные из PageSpeed Insights
Просто устанавливаем голый wordpress, накидываем тему и получаем следующее:
- Через function.php проведена чистка лишних функций wordpress, который захламляют код и увеличивают время загрузки сайта (удалены emoji, отключен REST API, его фильтры, события и embeds).
- Создано 2 меню адаптированных под bootstrap. Через админку создаете верхнее и нижнее меню.
- Подключён файл стилей style.css, Где вы можете указать собственный CSS код для костамизации шаблона (В этом файле я добавил небольшой код для украшения темы, однако, вы можете удалить этот код, чтобы сохранить исходный вид bootstrap).
- Миниатюры постов и кастомные размеры картинок.
Мы бы рекомендовали вам перенести блок
Нет ничего лучше для поисковика, чем страница для печати
Однако, перенос хедера — это дело ваше. Но в пользу своей позиции приведу авторитетный пример — https://devaka.ru/ .
После редизайна сайта в коде можно заметить, что хедер подгружается из футера (сайт тоже сделан на wordpress). А Сергею Кокшарову мы бы доверяли.
Файлы в теме Bootstrap WordPress
С файлами все стандартно — просто ничего лишнего.
- 404.php - шаблон 404
- author.php - шаблон вывода постов автора
- archive.php - архив постов
- category.php - шаблон постов категории
- comments.php - шаблон комментариев, там сам вывод и форма, разметка списка комментариев в functions.php
- footer.php - подвал сайта
- function.php - функции шаблона
- header.php - шапка сайта
- index.php - шаблон вывода последних постов для главной
- loop.php - пост в цикле
- page.php - обычная страница
- search.php - шаблон поиска
- sidebar.php - сайдбар
- single.php - отдельная страница поста
- style.css - стили темы и описание
- tag.php - посты по тэгу
- /js - скрипты бутстрапа и шаблона
- /css - стили бутстрапа
- /fonts - шрифты бутсрапа
Заметим маленький нюанс — блок
Скачивайте, пробуйте. Пишите свое мнение в комментариях.
Привет всем! Каждый, кто работает над дизайном и функциональной частью своего блога, в какой-то момент задумывается над тем, как можно ускорить и упростить этот процесс. Данной цели служат фреймворки. Это специальные библиотеки, которые дают возможность использовать уже прописанные заготовки кода, отличающегося валидностью и кроссбраузерностью. Сегодня вашему вниманию я хочу представить одно из таких решений – Бутстрап. В рамках этой статьи мы не будем детально изучать все тонкости работы с ним. Наша задача – узнать о его основных преимуществах, как подключить Bootstrap к WordPress и как с помощью данного фреймворка редактировать стили и структуру блога.
Что такое Bootstrap?
Бутстрап – это бесплатный фреймворк на базе css и JavaScript, предоставляющий целый ряд встроенных инструментов для создания адаптивных веб-сайтов, а точнее их front-end разработки. Изначально был создан для внутреннего использования компанией Twitter и носил название «Twitter Bootstrap», но в дальнейшем вырос в самостоятельный проект. Данная библиотека может быть использована в работе как со статическими html-файлами, так и с различными системами управления контентом, в которых поддерживаются внешние стили.
Вы можете самостоятельно отредактировать или даже создать, используя возможности Bootstrap, WordPress тему для своего блога. Для этого в арсенале фреймворка предусмотрено все необходимое и определены базовые стили для основных компонентов, которые могут быть использованы на сайте: навигации и форм, модальных окон и уведомлений, аккордеонов и каруселей, выпадающих списков и многого другого.
В интернете можно встретить множество разноплановых ресурсов, сделанных с помощью этой библиотеки. Читателям же моего блога, вероятнее всего, будут интересны Bootstrap шаблоны для WordPress. В Рунете вы найдете большое количество тем на основе фреймворка, в том числе и бесплатных. Они отличаются стильным дизайном и функциональностью.
Что же делает Бутстрап популярным среди разработчиков? Давайте рассмотрим ряд неоспоримых плюсов, которые мы получаем в работе с ним:
- открытый исходный код, то есть весь функционал предоставляется совершенно бесплатно;
- встроенная 12-колоночная сетка. Достаточно просто добавить нужный класс html-элементу, чтобы задать ему необходимо позиционирование относительно других объектов и каркаса страницы;
- адаптивность. Ранее я писала о том, и почему это однозначно необходимо делать. В Бутстрапе же данная опция включена по умолчанию и предполагает оптимизацию сайта под десктопные девайсы, планшеты и смартфоны. Помимо этого, вы можете сами установить любые варианты расширений вручную;
- вариативность в оформлении самых часто используемых на веб-страницах элементов. С помощью специальных классов легко можно управлять отображением и поведением событий, вкладок, кнопок и прочего. Предусмотрены и готовые решения для динамических элементов. Так, к примеру, чтобы создать слайдер, достаточно найти необходимый код в документации, скопировать его и разместить в своем блоге, заменив картинки из примера своими собственными. Как это работает на практике, я покажу вам дальше на примере установки в WordPress меню Bootstrap;
- иконочный шрифт. Приятный бонус в виде нескольких сотен иконок Glythicons в формате векторной графики;
- кастомизация, т.е. возможность выборочного использования тех или иных возможностей фреймворка, например: подключение к проекту только сетки и шрифтов, или только медиа, или комбинации из нескольких опций;
- легкость настройки – стандартные стили переопределяются простым созданием новых правил css, без применения «! important »;
- отличная документация с примерами. Несмотря на то, что официальный сайт англоязычный, не составит труда найти в интернете его русскоязычный аналог.
Основным минусом в работе с библиотекой может стать только то, что при редактировании или создании адаптивной темы Вордпресс Бутстрап-компоненты не могут быть просто добавлены из консоли CMS. Их использование потребует вставки дополнительного кода или установки вспомогательных плагинов.
Подключение фреймворка к Вордпрессу
Для начала скачиваем библиотеку с официального сайта — https://getbootstrap.com: жмем «Download Bootstrap» и в открывшейся вкладке «Getting started» выбираем вариант «Download Bootstrap». На текущий момент стабильной версией остается Bootstrap 3, но уже выпущена в режиме тестирования четвертая версия. Она имеет некоторые отличия от нынешней, но если вы изучите Бутстрап 3, то обновленный вариант фреймворка не вызовет никаких вопросов.

Распаковываем архив и видим 3 основных папки: css, js , fonts . Файлы, содержащие в своем названии «min» ничем не отличаются от одноименных без этой частицы. Она обозначает, что код записан без пробелов, в одну строку, для уменьшения веса файла без потерь в функционале. Такой формат нечитабелен, но как раз он зачастую и подключается к проекту. Это позитивно влияет на . В папках css и js лежат соответственно файлы стилей и скриптов, а в папке fonts – те самые векторные иконки, которые упоминались выше. По сути, мы видим здесь один шрифт, представленный в нескольких форматах.
Один из удобных способов размещение файлов фреймворка в проекте – создание отдельной папки. Для этого в корне сайта в каталоге wp-content – themes – название_вашей_темы формируется папка libs , где в дальнейшем могут находиться другие библиотеки, используемые в проекте. И уже в ней – папка bootstrap , куда мы и копируем все содержимое, извлеченное из архива.

Как мы уже отмечали ранее, существует возможность выкачать только отдельный функционал Бутстрапа, например сетку или иконки. Это реализовывается на странице официального сайта «Customize».

Здесь необходимо снять галочки с тех компонентов и плагинов библиотеки, которые вы не хотите подключать к проекту. А затем, прокрутив страницу вниз, загрузить кастомизированный вариант Bootstrap, нажав «Compile and Download».


Дополнительно, для переопределения бутстраповских стилей и «родных» стилей темы, можно создать в папке шаблона в каталоге css файл style.css . Если вы не знакомы со структурой шаблона Вордпресс, статья о том, обязательна к прочтению.
Чтобы подключить Bootstrap к WordPress, открываем в текстовом редакторе файл functions. php , который лежит в каталоге вашего активного шаблона. Находим функцию подключения скриптов (она может называться, например, funct ion twentysixteen_ scripts (){} , по названию темы) и вставляем следующий код:
| 1 2 3 | // Bootstrap stylesheet. wp_enqueue_style( "bootstrap-style" , get_template_directory_uri() . , array () , " " ) ; |
// Bootstrap stylesheet. wp_enqueue_style("bootstrap-style", get_template_directory_uri() . "/libs/bootstrap/css/bootstrap.min.css", array(), " ");
— данная строка подключает минимизированный файл стилей фреймворка. Первый параметр функции (" bootstrap — style ") – произвольное название подключаемого объекта.
Следующий параметр (get _ template _ directory _ uri () . "/ libs / bootstrap / css / bootstrap . min . css " ) – путь к файлу. Здесь с помощью функции get _ template _ directory _ uri () мы получаем путь к папке с активным шаблоном, а затем «пристыковываем» непосредственно путь к файлу в этом шаблоне — . "/ libs / bootstrap / css / bootstrap . min . css " .
Продолжаем вставлять код:
| 1 2 3 4 | //Mytheme stylesheet. wp_enqueue_style( "mytheme-style" , get_template_directory_uri() . "/css/style.css" , array () , " " ) ; |
//Mytheme stylesheet. wp_enqueue_style("mytheme-style", get_template_directory_uri() . "/css/style.css", array(), " ");
— аналогичным образом подключаем наш собственный файл стилей, в котором сможем изменять правила Bootstrap. Обратите внимание, для того, чтобы это стало возможным, наши стили должны подгружаться после стилей фреймворка. Т.е. необходимо разместить эту строку кода так, чтобы она находилась после кода, отвечающего за подключение стилей библиотеки.
И последняя строка, которая нам понадобится для подключения Bootstrap к WordPress:
| 1 2 3 4 | //Bootstrap js wp_enqueue_script( "bootstrap-js" , get_template_directory_uri() . , array ("jquery" ) , " " ) ; |
//Bootstrap js wp_enqueue_script("bootstrap-js", get_template_directory_uri() . "/libs/bootstrap/js/bootstrap.min.js", array("jquery"), " ");
— в конце мы подключаем минимизированный файл скриптов. Здесь нам понадобится третий параметр функции – array () , который отвечает за очередность подключения скриптов. Дело в том, что Бутстрап зависит от библиотеки jQuery. Если на момент, когда сервер будет подгружать наш фреймворк, jQuery еще не будет подключено к проекту, скрипты Бутстрапа не сработают. Саму библиотеку jQuery нам загружать не надо, поскольку Вордпресс делает это автоматически. Но чтобы подключение происходило в необходимой нам последовательности, мы определим, что js-скрипты Bootstrap должны всегда идти после jQuery. Именно это и делает строка array ("jquery") .

Если же вы создаете Бутстрап-тему для WordPress с нуля или просто не хотите смешивать все скрипты в одном месте, предлагаю вам создать отдельную функцию для подключения Bootstrap 3 к WordPress. В конце файла functions.php расположите следующий код:
| 1 2 3 4 5 6 7 8 9 10 11 12 13 14 15 16 17 18 19 20 21 | function load_bootstrap() { function load_bootstrap() { // Bootstrap stylesheet. wp_enqueue_style( "bootstrap-style" , get_template_directory_uri() . "/libs/bootstrap/css/bootstrap.min.css" , array () , " " ) ; //Mytheme stylesheet. wp_enqueue_style( "mytheme-style" , get_template_directory_uri() . "/css/style.css" , array () , " " ) ; //Bootstrap js wp_enqueue_script( "bootstrap-js" , get_template_directory_uri() . "/libs/bootstrap/js/bootstrap.min.js" , array ("jquery" ) , " " ) ; } add_action("wp_enqueue_scripts" , "load_bootstrap" ) ; |
function load_bootstrap() { function load_bootstrap() { // Bootstrap stylesheet. wp_enqueue_style("bootstrap-style", get_template_directory_uri() . "/libs/bootstrap/css/bootstrap.min.css", array(), " "); //Mytheme stylesheet. wp_enqueue_style("mytheme-style", get_template_directory_uri() . "/css/style.css", array(), " "); //Bootstrap js wp_enqueue_script("bootstrap-js", get_template_directory_uri() . "/libs/bootstrap/js/bootstrap.min.js", array("jquery"), " "); } add_action("wp_enqueue_scripts", "load_bootstrap");
— где load _ bootstrap () – произвольное название созданной нами функции, а последняя строка дает ее движку на выполнение.
Основные возможности Бутстрапа и как это работает
Чтобы понять, каким образом возможно взаимодействие WordPress и Bootstrap, давайте разберем сам принцип работы фреймворка.
Итак, в файле стилей Бутстрапа прописаны специальные классы, которые добавляются в html-разметку, определяя тем самым отображение или поведение элементов.
Разметка: контейнеры и ячейки . Структура разметки Bootstrap основывается на блочной системе вложенных элементов. Контейнеры наивысшего порядка, выступающие оберткой, формируются методом добавления к ним классов .container или .container-fluid , в зависимости от того, хотим мы получить блок с адаптивной фиксированной шириной или «резиновый».
Уровнем ниже располагаются вложенные блоки с классом .row . Эти структурные элементы представляют собой строки, которые организовывают горизонтальные группы ячеек.
Контент размещается в ячейках. Каждая строка разбита на 12 ячеек – html-элементов с классами .col – lg-*, col- md-*, col- sm-*, col- xs-* . Эти классы определяют ширину ячеек для телефонов (xs ), планшетов (sm ), десктопных девайсов с небольшим монитором (md ), для экраном с большим расширением (lg ). А вот какая цифра в пикселях подразумевается под каждым из этих расширений:

Вместо звездочки в названии класса указывается число от 1 до 12, равное количеству ячеек, которое должен занимать элемент. Но сумма всех ячеек в пределах одной строки не должна превышать 12. Вот пример кода:

А вот так он будет выглядеть в браузере:

Подробно и с примерами, как работать с сеткой Бутстрап, описано в документации фреймворка на официальном сайте в разделе «CSS» — «Grid system».
Таблицы . Фреймворком предусмотрен ряд классов для элементов «table», позволяющих с легкостью стилизовать таблицы:
- . table – базовый стиль, только горизонтальные границы;
- . table- striped – чередование серых и белых строк в таблице;
- .table-bordered – формирование всех границ строк и столбцов;
- . table- hover – подсветка строки таблицы при наведении;
- . table- responsive – этот класс делает таблицу адаптивной ко всем устройствам.

Кнопки . Для создании стильных кнопок Бутстрап тоже предлагает ряд классов формата .btn-* , где вместо звездочки можно подставить любое значение из скриншота ниже и получить соответствующую кнопку:

Вот так, например, необходимо прописать ваш элемент «button», чтобы получить зеленую кнопку в стиле Bootstrap 3:
Изображения . Для элементов «img» тоже есть интересные решения:

Это всего лишь малая часть возможностей Бутстрапа. Фреймворком предусмотрены классы для работы с типографикой, иконками, формами, всплывающими подсказками, навигацией и многим другим. Если вы оценили, какие преимущества может дать функционал Bootstrap для WordPress-блога, обязательно изучите документацию по данной библиотеке.
Как сформировать меню Bootstrap на Вордпресс
Мы с вами уже знаем, как подключить Bootstrap к WordPress , и теперь можем рассмотреть пример практического применения фреймворка для блога. Для этого мы заменим существующее меню активной темы адаптивной навигацией Бутстрап. Я буду использовать в примере тестовый шаблон на базе темы Вордпресс «Twenty Siхteen», где у меня уже создано двухуровневое меню.
Находим код меню «Default navbar», предлагаемый на официальном сайте фреймворка в разделе «Components» — «Navbar»:

Редактируем по необходимости. Я уберу, например, ссылку на логотип (Brand), форму и список с классом . navbar- right . А эту часть:
| 1 2 3 4 5 6 7 8 9 10 11 12 13 14 15 16 17 18 19 20 21 22 23 24 25 26 |
— заменяем следующим кодом:
| 1 2 3 4 5 6 7 8 9 10 11 12 13 14 15 16 17 18 19 | "top_menu", "depth" => 2, "container" => false, "menu_class" => "nav navbar-nav", //Process nav menu using our custom nav walker "walker" => new wp_bootstrap_navwalker())); ?> |
"top_menu", "depth" => 2, "container" => false, "menu_class" => "nav navbar-nav", //Process nav menu using our custom nav walker "walker" => new wp_bootstrap_navwalker())); ?>
Конечный результат навигации размещаем в соответствующем файле вместо существующей. У меня это файл header.php :

| 1 2 3 4 5 6 7 8 9 10 11 12 13 14 15 16 17 18 19 20 21 22 23 24 25 26 27 28 29 30 31 32 33 34 35 36 37 38 39 40 41 42 43 44 45 46 47 48 49 50 51 52 53 54 55 56 57 58 59 60 61 62 |
|
В строке " menu " => " top _ menu " указывается меню, которое вы назначили основным в админпанели. " depth " => 2 – уровень вложенности для тех случаев, если есть выпадающие пункты. " menu _ class " => " nav navbar — nav " – здесь указываются классы меню из Бутстрапа, которые мы использовали.
Но для интеграции навигации Bootstrap в WordPress нам потребуется еще один файл со специальным классом – wp _ bootstrap _ navwalker . php . Его можно скачать с GitHub по ссылке — . Здесь нажимаем кнопку «Clone or Download» и выбираем «Download ZIP».

Извлекаем файлы из архива и в папке «wp-bootstrap-navwalker-master» копируем необходимый файл.

wp _ bootstrap _ navwalker . php размещаем в папке нашей темы. Возвращаемся к файлу functions.php и в начале подключаем скачанный класс:
//Register custom navigation walker
require_once ("wp_bootstrap_navwalker.php");
Наша адаптивная навигация Бутстрап для Вордпресс-шаблона готова. Дальше дело остается за стилями. Вот такое меню получилось у меня:
При наведении раскрывается выпадающий список, а на маленьких экранах ссылки навигации скрываются и вызываются при помощи иконки меню.

Все детали подключения Bootstrap к WordPress и создания меню на основе фреймворка можно узнать из видео:
Если же вам некогда изучать все нюансы работы с библиотекой на WordPress, воспользуйтесь плагинами Bootstrap, самые популярные из которых – WordPress Twitter Bootstrap CSS и Easy Bootstrap Shortcode .
На этом наше знакомство с фреймворком окончено. Сегодня мы узнали, как произвести подключение Bootstrap к WordPress, об основных преимуществах данной библиотеки и о функционале фреймворка, который может помочь нам в создании современной адаптивной темы. Изучайте туториалы и экспериментируйте!